Quantcast
Channel: Sage X3 – Tips, Tricks and Components
Viewing all 1519 articles
Browse latest View live

Workflow of Quality Control Process in X3

$
0
0

Quality Control is one of the most important aspects for any company. As you know X3 does provide feature to keep tabs on products that are not qualified to be kept in the Inventory. Today I’ll provide a brief introduction with an example on how to emulate your company quality control process in X3.

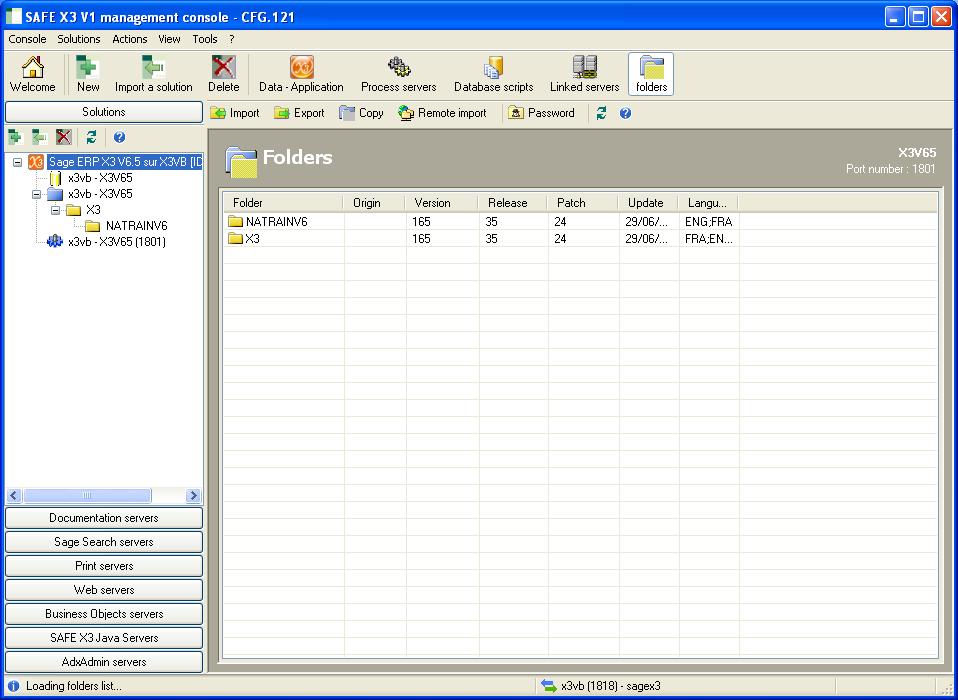
The Quality Control Screen is present in the Inventory Module of Sage X3(Inventory->Quality Control).
The Quality Control process begins with an Analysis Request which can be performed (as you had expected) from the Analysis Request screen under Quality Control.

Quality1

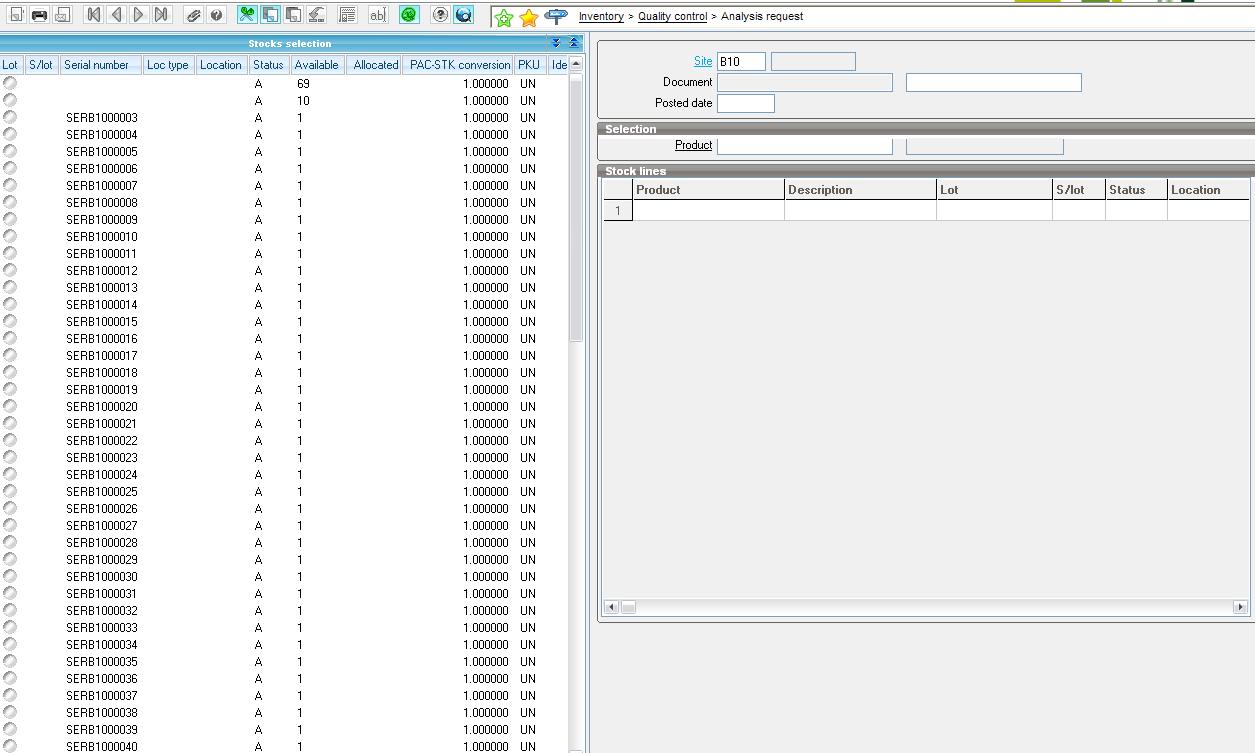
In the Analysis Request Screen you will have enter the site and the Stock Selection Left browser will be filtered on the basis of the site selected. Select the stock from the left browser .Edit the quantity of the Stock line to suit your needs and save the document to submit the analysis request. You can check the Stock at your site to find that the status of the entered quantities has been changed to “Q” (Quality Control).

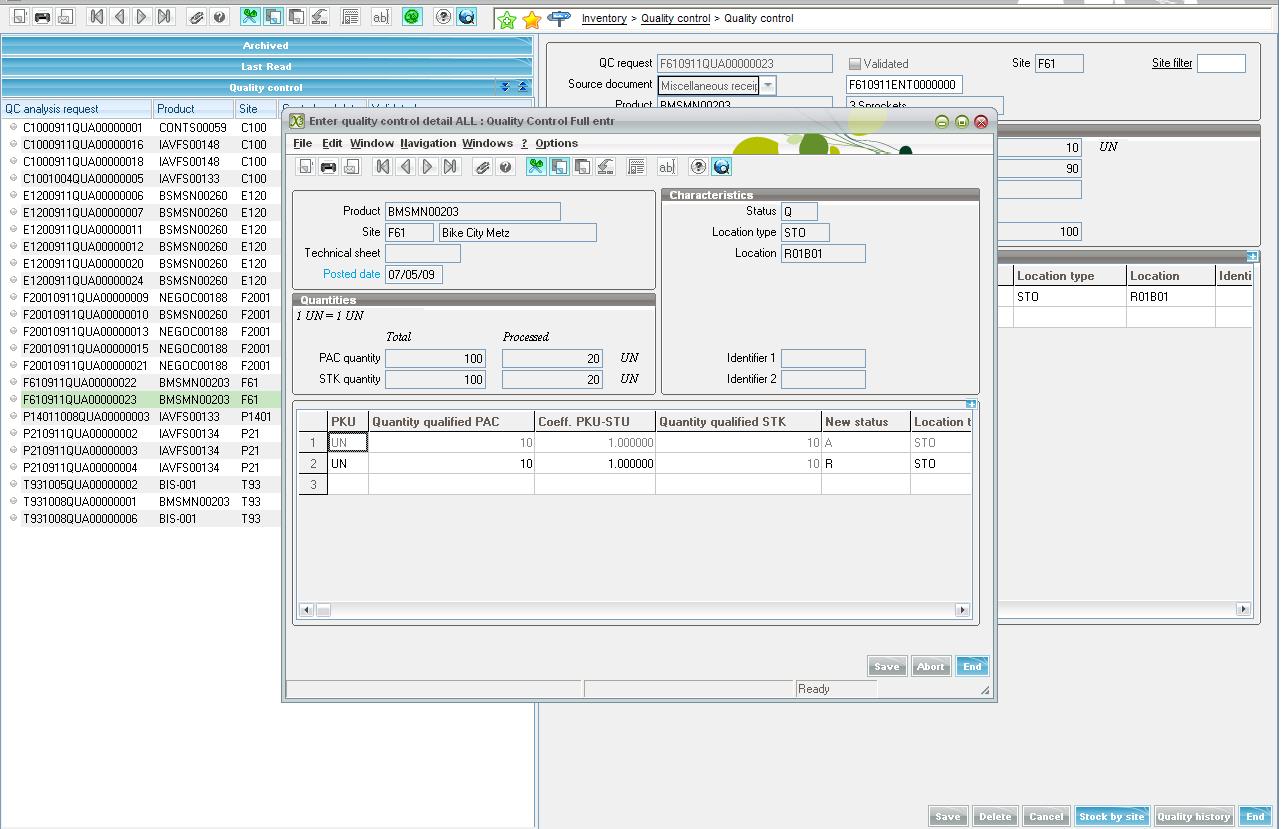
When your Quality Control department has completed their processes and has decided on the amount to be rejected and accepted they can change the status of the product in X3 as well from the Quality Control Screen under Quality control.(Inventory->Quality Control->Quality Control).

Quality2

From the above screen you can select the QC Requests that have been submitted. The Right on the Quality Control details lines and select enter quality control detail. The below screen will appear which will allow you to enter the quantities that have been Qualified as Accepted (A) or Rejected (R) by setting the status of the quantities as A and R respectively.

Quality3

I hope this article will help you in setting up the quality control process in your organization.


How to Filter Left List in X3

$
0
0

In customization we developer may came across the situation where there is need to filter the left list of the X3 screen. We can achieve this with the simple code.

CLEGAUCHE is the action which called before loading the left list so we can use this action to modify the characteristics of the sort key.

The following variables can be entered:

  1. SNSLIS 1 = ascending, 2 = descending
  2. LENLIS indicates the number of elements in the key
  3. CLELISTE string of 250 characters containing the list of component fields for the key separated by the character “;”.

Filtsup is the variable which we can use for filtering the left browser. This filter is expressed in the form of a character string containing a logical condition on one or more several fields in the principal table. For example suppose I want to display only active customer in customer screen. To do this I have assigned the sort key “BPCSTA=2” to FILTSUP variable. Now whenever the customer screen is opened only the active customers will get displayed. Refer to the below screen shot for more clarification.

 leftlistfltr


Hope this helps.

How to generate a Log File

$
0
0

Every process needs to be traced as this helps in finding out the success/failure and even the reason of the failure of the process. All this is done with a log file, but now it becomes important to know how we are going to handle these log files for own customization in X3.

Whenever we code in X3 we would like to the system to print log same as the default X3 system works, below is the snippet of few lines of code which will make your life easy.

LogFile1

Below is the explanation of the commands used to handle the log file:

  1. OUVRE_TRACE: Opens log file for writing
  2. ECR_TRACE: Write to log file
  3. FERME_TRACE: Closing log file
  4. LEC_TRACE: Displaying log file

Just check the screen shot of the Log File which is generated via code written above.

LogFile2

Hope this helps.

How to solve the posting Error “No Account Found”

$
0
0

Have you ever faced the situation in Sage ERP X3 where you are posting the transactions or running the valuation and getting the error message “No account found”? If yes then here is the solution for this.

As the error itself says that the accounts are not defined, needed while the posting the transaction. Thus the solution will be to assign the accounts needed to the respective entity, but now you all may be wondering and thinking “Where will I define this account?”.

The answer stays simple, Sage ERP X3 has a menu termed as accounting codes wherein we need to assign the needed accounts against the different entities e.g. Customer/Supplier/Product etc… If the accounts are not assigned against these entities in the Accounting Setup in that case every time the user tries to post a transaction or run the valuation he/she may get the “No Account found” error.

To set up the Accounting codes navigate to:

Setup -> Financials -> Accounting interface -> Accounting codes

AccountingCode

I hope this will be helpful to you.

Related Posts:

       How to check for Accounting Codes in X3

Copying Folder through Sage X3 Management Console Application

$
0
0

Folder Copying is to include reference/common data as well as any transactional data from one Sage ERP folder to other. Now, this is possible from within the Sage ERP X3 Client Application, though that encompasses multiple tasks; Creation of a Copy Folder, the Export/Extract Data out of the source folder, and Final steps of Importing data into the New/destination Folder. Each step is as time-consuming as the previous.

Fortunately there is another way. The answer wasn’t in the X3 Client Application, but in Sage X3 Management Console application. The Sage X3 Management Console is for X3 System Administration/Management.

1)     We start with opening the Sage X3 Management Console Application. Go to Solutions and click on folders.


CopyFolder1

2)     Select the folder that you want to copy and click on “Copy”. It is mandatory to select a folder for copying. It will pop up a window that will ask for the folder to be created.
Here if the folder name that you have entered already exists, it will ask to replace it. Select “Yes” if you want to override the data on the existing folder or else select “No” and provide a new folder name that does not exist in your Sage ERP X3.

CopyFolder2

3) Next we get the options screen, which is understandably simple; here we specify the admin password (if any), the reference folder and the Copy Folder.

CopyFolder3

4) Clicking on Next starts the process of copying the folder

CopyFolder4

5) Once done it will give completed message box and it will be available in the folders section of the Solutions part in your Sage ERP X3.

This will give you a easy way to copy the folders.

Related Posts:

         How to Allow Specific Processing without Folder Validation

        Error while importing folder in Sage X3

        Folder modifications in progress message in Sage X3

        Delete Folder in Sage X3

Deferred Validation In X3

$
0
0

Within X3 many a times we come across deferred validation option. The deferred validation is nothing but the postponing of the validation or set the timer to perform the specific validations like if you check the Deferred Validation check box while integrating the patch then it will just installs the patch but it won’t validate table or screens that are going to be affected by integrating the patch.

Unlike patch integration the deferred validation option is also available for Dictionary validation. At the bottom of Dictionary validation screen there are two buttons “Ok” and “Deferred”.  When we click on Ok the validation will start immediately but if you click on deferred button it will pop up another window as shown in below screen shot and here it will allow you to set the Date and time when the validation should get started.


We can also check for the status of the suspended validations in Request Management screen [VALIDCO] as shown in below screen shot. To access the Request Management screen navigate through: Usage > Batch server > Request management.

DeferedValid2


Related Posts: How to Allow Specific Processing without Folder Validation

Closing of Screen via Code

$
0
0

While integrating the X3 with third party application I came across a scenario where I needed to close my X3 screen when another application opens up and that also from the same screen.

Doing that was little bit technically complicated but after some findings and research I found a solution which solved my problem. Suppose we add an option in order screen called “Internet Sites” and we have to call “Google” from there and at the same time we want to close the order screen also(refer below screen shot).

CloseScreen1

For this all we have to do is to write a line within the processing file and you are sorted:

Close Local Inpbox [SOH1]

This will automatically close the sales order screen.

Hope this clarifies.

Entry Transaction in X3

$
0
0

Someone who is new to Sage X3 will always come across a query, what is Entry transaction? And obviously look for answers and we will be really glad to provide a solution.

Entry Transaction provides the ability to define different frameworks for the same Transactions screens, but surprisingly without any customizations.

Just me give you an example, if we consider the sales order screen and we are looking to keep different screen look and feel as per the user, don’t it seem to be complex to achieve in other ERP’s. But it is just a task of few minutes in Sage X3.

Just check the screen shot below, you will find user can mark the fields Hidden/Displayed/Entered, and decide what will be the screen look like. Thus select the needed configuration and validate the Entry Transaction to make it effective.

EntryXtion1

Once this is validated the entry transaction gets added and when you select this you will be able to see the cutsomized screen.


EntryXtion2

I hope this serves your need.


Related Posts:

             Entry transaction Validation via Patch


Allocate Invoices to Posted Pre-Payments in Sage X3

$
0
0

In most businesses, bulk payment is done by Customer before the invoices are generated for them. Now such scenarios are handled as follows in Sage X3:

  1. Let us create a Customer Payment:

AllocateInv1

2) Let’s post this Payment.

AllocateInv2

3) Check the Open Items.
AllocateInv3

4) Now create an Invoice and post it.
Check the Open Items:

AllocateInv5

Go to “A/P-A/R accounting àOpen itemsàCustomer prepayment posting” and assign the invoices to the Payments.

AllocateInv6

Click on Save for allocation of Invoice to Payment.

AllocateInv7

Check Invoice has been allocated.

AllocateInv8


Hope this blog helps.

 Related Posts:

             Supplier pre-payment settlement in Sage X3

            Send Invoice Reports Automatically in Sage X3

            How taxes are determined in Sage ERP X3 Sales Invoices

How to Check for Patch conflicts

$
0
0

Ever wondered why your development is not getting the reflecting correctly even though everything went with the Patch installation. Well, it may happen if the patched elements are in conflict with the modified elements (in this case, the elements, protected by an activity code, are not patched, and this can cause problems).

You can use a simple tool in Sage X3:

Development -> Utilities -> Patches -> Patch Test.

PatchConflict1

This function detects potential conflicts linked to patch file. It carries out the following tasks:

  1. It reads all the patches found in a directory
  2. For each patched object, it looks to see if there is a potential conflict due to a custom/specific activity code (except if the custom/specific activity code has been placed at the head of the patch such as prior to being deleted)
  3. It generates a log file detailing the possible conflicts.

With this log, you can save lot confusion. Hope this helps.

Related Posts:

                         Publishing the Web Service via Patch

                         Automatic Patch Creation in Sage X3

What is Stock Resynchronization

$
0
0

A few days back we had come across a strange situation in our X3 while using the Stock change functionality from the Inventory Transfer Screen. I tried to transfer one of the products (the product was in Lot) from one Inventory location to another. But due to a network error the transfer of the product was not successful.

Now here is the most intriguing part: When I tried to do the same Inventory Transfer again the lots in the Source Site showed zero quantity. So I investigated the Site which I used as the destination and could find the quantities there too. All Inventory reports indicated that the Quantities are still in the Original Site and lot.

After brainstorming for quite some time I came across the screen ‘Stock Re-Synchronization’. All I did was entered the Source site, Product name, checked the Re-calculate Stock lots checkbox and Clicked on Ok. After the completion of the process I tried to transfer my inventory again and the quantities were back in the lots.

StockResync1

Hope this blog was of assistance to you. We will be checking out more functionality available from this screen and will make sure that we blog our understanding and experiences in the coming days.

Related Posts: 

          How to perform an Inter-Site Transfer

        How to override Stock Management rules in Sage X3

How to Acess Browser from X3

$
0
0

Many of the times when we develop any integration of X3 with third party system we come across the scenario where we need to open the Browser. This requirement is little complex and takes some for the findings. But going through our blog will reduce your efforts and will help you out in achieving the functionality.

Suppose we need to access “GOOGLE” after clicking the Link button from Customer screen (Refer below screen shot).

AccessIe-1

For achieving this functionality we need to find the correct event and the below code needs to be written.

AccessIe-2

Hope this clarifies.

Including ‘Non Managed’ Products in Work Orders

$
0
0

In Sage X3 standard functionality, we are not allowed to add a ‘not-managed’ product in the Work Order. We can only add Managed Products in Work orders. In one of our development we face the same scenario. While creating a Work Order through Production BOM we added ‘TEST1’ as our Parent Product and ‘TEST2’, ’TEST3’ as child products. Our ‘Test2’ product was not managed and hence was not included in the Work Order.


We even tried all possible scenarios of creating the Work Order like Sales Order to work Order but were always being blocked to add Not-Managed products. Check out below snapshots.

NonManagedProd-1

NonManagedProd-2


We have to enhance X3 functionality for moving on with the development. After coding up few lines and doing slight modifications we succeeded to add not-managed product in the work orders.

NonManagedProd-3

On adding this functionality user can add all the products to Work Order irrespective of being they are managed or non-managed.


Modify Data of Tables in X3

$
0
0

Sage X3 has a very interesting and useful functionality which gives possibility to manipulate the data in any table in the database, without making checks on the data other than that coherency checks introduced by the internal types of the data like date, character string, numeric values etc. This represents a maintenance operation essentially intended for developers and should not under any circumstances be left in the hands of unauthorized users. Only users having the admin profile can execute this function.

To use this function navigate to: Development > utilities > Maintenance > In Columns

After navigation, the window given in below screen shot will pop up. Enter the folder name followed by table name whose data needs to be modified. Then click on OK button. Mark the fields as ‘Enter’ whose data you need to modify and again click on OK button.

ColMaintain-1

All tables can be viewed, and the majority of them can be modified using this function. Then after, you can modify the data of the table. Check out screen shot below.

ColMaintain-2

This maintenance function does not allow the creation of records. It can be used however, to modify a limited number of fields more globally, because the fields are displayed in columns, each record being displayed as in a line in a grid.

No matter if the field is marked as display in Mask or you want to change the data of completely Ordered Sale Quote. All you need is to use the above functionality.

Hope this helps!!

How to block order if Prepayment is not done

$
0
0

Sage ERP has an interesting functionality through which we can restrict the delivery of the order if the prepayment against that order is not done i.e. the assigned due date against that order is passed.

By default in X3 it allows the user to create a delivery of the order even the prepayment against that order is not deposited.  So that if you want that your order should not get delivered until and unless you have received the prepayment against the order then follow the below given instruction.

  1. Navigation to Setup>General parameters>Parameter values

BlkPrepay-1

2. Simply navigate through the above given path.

3. Under the left list browser click over the VEN Sales, under that select the folder.

4. Just right click over the ORD (Order Rules) under the Group and then click on Detail button.

5. Change the value of the LOKORD parameter to ‘YES’ as show in the below screen.

BlkPrepay-2

Hope this clarifies..


Not allowing product to sale in restricted state

$
0
0

In X3 we do not have the functionality where we restrict the product to be sale only in the state where we deal with. Normally when we create any sales order or sales quote we don’t have the functionality to mark the product as restricted to certain state that we want.  To achieve this functionality we did few modifications by adding a new filed called as Restricted State on the Product as shown in the below screen shot.

RestProd-1

On click of the icon a new window pop-up called Restricted state as show in the below screen shot.

RestProd-2

In Restricted state window you can add the state and reason that why you want to restrict the product against the entered product.

Hope this functionality will bring a new enhancement in your existing X3 system.

Set Customer Credit Limit Level

$
0
0

In ERP Sage X3 we can set the credit limit on different level i.e. Folder level or Company level.

By default credit limit is set upped on folder level. You can change the credit limit setting through following steps:

1. Navigate through Setup > General Parameters > Parameter Values. You will get the below screen.

Creditlevel-1

As shown in the screen shot select the option’s TC common Data > Folder >” folder name”.

  • Right click the OST group labeled “Credit level” and click on detail, you will get the below screen of Parameter Values. Choose the values “Company” or “Folder” for the OSTCL parameter.

Creditlevel-2

This two credit limit levels works in following way:

  1. Folder Level: If the credit limit is on folder level then the credit authorized to customer will belongs to all the companies present in the folder..
  2. Company Level: If the credit limit is on company level then the credit authorized to customer will be separate for all the companies present in that particular folder.

Example: Suppose authorized credit of customer is 1000USD then

  1. If credit limit is on folder level then authorized credit 1000USD will belongs to all the companies present in folder.
  2. If credit limit is on company level then authorized credit 1000USD will be allocated to each company separately.

Tracking your Development affected through Activity Code

$
0
0

Assigning Activity Code to the Customized development is the basic understanding in X3. Often our development spreads vast in X3 and we are not able to recognize that which screen, table, field, window, object, action, report, etc. we have developed/modified and assigned our activity code.

X3 provides very useful feature used for tracking all our development/modification through activity code. To track your development simply follows the below steps:

  1. Navigate to: Development > Utilities > Searches > Activity code & enter your Activity Code.

Search1

       2. Mark the fields you wish to track.

      3. Click ‘OK’ button.

After this X3 will generate a log file having the details based on activity code. Check below screen shot.


Thus, tracking all of your development is just one click away.

Hope this Helps!!

How to filter Local Menu

$
0
0

In X3, we developer may came across with requirement where we need to filter the local menu values for the fields. There are simple techniques available in X3 to filter the local menu values.

Follow the below steps to filter the local menu field records:

  1. The M data type of local menu is non-modifiable however in X3 there is alternate data type is available i.e. MM whose values we can modify at the run time. Therefore use the MM data type for the local menu which you want to filter run time as shown in the below screen shot.
  2. Add Before entry field action on that field.

     LocalMenu13. The GMENLOC global variable can be used to filter the local menu values. We just need to set the GMENLOC(i) variable to 1 to deactivate the local menu values. It will be more preferable to set the values to GMENLOC variable in the Before Entry field action as it gets called before get focus to the field. Refer to the below snippet of code in which for the transmittal type field I have deactivated the 3rd, 4th and 5th value.

LocalMenu2

    4. In the above example for the transmittal field I have deactivated the 3rd, 4th and 5th values and thus it is only showing the first 2 values.

LocalMenu3

Hope this helps!

How to Track Revision in Sales Order

$
0
0

Sage X3 enables us to help keep a track on the revisions made to Order Documents. The revision number tracking can help us determine the number of times the order had undergone changes.

You will need to tweak the Parameter SALREV in VEN Sales chapter as Sage X3 do not have the feature of Revision management by default.

TrackRev-1

As displayed in the screenshot we have to change the value of the parameter SALREV to ‘Yes’. Save the changes and the revision management feature becomes enabled for the sales order.

TrackRev-2

The marked box in the screenshot above displays the revision number for the Sales order. You can also enable the revision management feature in other transaction screens by changing the necessary parameter values.

Viewing all 1519 articles
Browse latest View live


<script src="https://jsc.adskeeper.com/r/s/rssing.com.1596347.js" async> </script>