Quantcast
Channel: Sage X3 – Tips, Tricks and Components
Viewing all 1515 articles
Browse latest View live

How to set condition for purchase order close

$
0
0

Sometimes we come across a scenario where user needs the purchase order to be closed only after certain conditions or never. Sage provides a functionality ‘PO line closing method’ which helps the user in setting them. 

Navigate: Parameter –> Parameter values –> Purchase 

Click on Rest Management — > PO line closing method

Set the parameter with desired condition. For example if user never wants PO to be closed. Then set the parameter to never.

Refer below screenshot.

Parameter values

Now even if user creates a PR for full Qty of the referenced PO the order never closes.

Hope this helps!

About Us

Greytrix is a one stop solution provider for Sage ERP and Sage CRM needs. We provide complete end-to-end assistance for your technical consultations, product customizations, data migration, system integrations, third party add-on development and implementation expertise.

Greytrix has some unique solutions of Sage X3 integration with Sage CRMSalesforce.com and Magento eCommerce along with Sage X3 migration from Sage 50 US, Sage Pro and QuickBooks.  We also offer best-in-class Sage X3 customization and development services to Sage business partners, end users and Sage PSG worldwide.

For more information on Sage X3 Integration and Services, please contact us at x3@greytrix.com. We will be glad to assist you.


Adding Graphical requester in Interactive Dashboard

$
0
0

To create Graphical Requester, follow below steps.

Step 1: Create graphical requester.

Set up → Usage → Report → Graphical Query tool

Graphical requester screen

1.1 Graphical requester screen

Step 2 : Create Menu Item.

Navigate to Administration → Authoring → Pages → Menu Item

Menu item screen

1.2 Menu item screen

As shown in above screenshot, we have created menu item with Link type as ‘QUERY’ and select Graphical requester query in i.e. ‘ZCUST’ in Query name field.

Step 3 : Create home page.

Navigate to Administration → Authoring → Pages → Home pages

Home page screen

1.3 Home page screen

As shown in above screen shot we have created home page ‘CUSTOMER_DETAILS’ and selected menu item ‘ZCUSTOMER’ in Gadgets field.

Step 4 : Create  New Landing page.

select landing page

1.4 select landing page

Select option Queries as shown in below screenshot.

New Gadget- Query selection screen

1.5 New Gadget- Query selection screen

Select gadget as shown in below screenshot.

Add new gadgets screen

1.6 Add new gadgets screen

About Us

Greytrix is a one stop solution provider for Sage ERP and Sage CRM needs. We provide complete end-to-end assistance for your technical consultations, product customizations, data migration, system integrations, third party add-on development and implementation expertise.

Greytrix has some unique solutions of Sage X3 integration with Sage CRMSalesforce.com and Magento eCommerce along with Sage X3 migration from Sage 50 US, Sage Pro and QuickBooks.  We also offer best-in-class Sage X3 customization and development services to Sage business partners, end users and Sage PSG worldwide.

For more information on Sage X3 Integration and Services, please contact us at x3@greytrix.com. We will be glad to assist you.

How to assigns a default format to each type of field

$
0
0

In this blog, we will look how to assign a default format to each type of field and allows you to modify them. Adxfmt is an Adonix system variable of the table of 8 Char of 255 characters, which provides a default format according to the type of field of the file managed.

Syntax:  [S]adxfmt(255)(8)Char

Example: #Replace it with floating digits

[S]adxfmt(5) = “15F”

Below are the various indexes of asxfmt and the default value to initialize.

Index Field Type Value
0 Description ##
1 Short Integer 5#
2 Long Integer 10#
3 Decimal 9.2
4 Floating 5.2
5 Dual Precision 9.2
6 Alphanumeric X
7 Date DD2

Note:

adxfm is usually set by one of the processes called  “APL” that is launched when you start up the application. Otherwise, the default values will be saved.

About Us

Greytrix is a one stop solution provider for Sage ERP and Sage CRM needs. We provide complete end-to-end assistance for your technical consultations, product customizations, data migration, system integrations, third party add-on development and implementation expertise.

Greytrix has some unique solutions of Sage X3 integration with Sage CRMSalesforce.com and Magento eCommerce along with Sage X3 migration from Sage 50 US, Sage Pro and QuickBooks.  We also offer best-in-class Sage X3 customization and development services to Sage business partners, end users and Sage PSG worldwide.

For more information on Sage X3 Integration and Services, please contact us at x3@greytrix.com. We will be glad to assist you.

How to create work orders in bulk by using Batch process

$
0
0

Sage X3 has standard feature where you can create the bulk of work orders by using the back to back batch process.

Fallow the below steps.

  1. Set Back to back check box checked.

work orders in bulkIMG: Product screen

  1. Select product source work order on sales order.

product source work order

IMG: Sales order screen

  1. Navigate to : Manufacturing >> Batch process>> >>Allocation\De-allocation>>Back-to-back orders

work orders Home screen

IMG: Home screen

  1. On the screen , enter sales order numbers for processing , you can also use other filters such as Customer , Site.

Back to back orders screen

IMG: Back to back orders screen

Now, if the work orders are successfully created, then it can be also seen in the generated log.

Log screen work orders

IMG: Log screen

Hope this helps!

About Us

Greytrix is a one stop solution provider for Sage ERP and Sage CRM needs. We provide complete end-to-end assistance for your technical consultations, product customizations, data migration, system integrations, third party add-on development and implementation expertise.

Greytrix has some unique solutions of Sage X3 integration with Sage CRMSalesforce.com and Magento eCommercealong with Sage X3 migration from Sage 50 US, Sage Pro and QuickBooks.  We also offer best-in-class Sage X3 customization and development services to Sage business partners, end users and Sage PSG worldwide.

For more information on Sage X3 Integration and Services, please contact us at x3@greytrix.com. We will be glad to assist you.

How to get Folder Language from code in Sage X3

$
0
0

Sage X3 can have more than one folder. You may have come across a scenario where you need to know current folder language while accessing Sage X3 ERP. This can be achieved using the variable ‘messname’. This variable is accessible only in read mode.

Please refer below screen shot for the syntax.

Current Folder Language Code

 Figure 1: To get Current Folder Language Code

Hope this blog helps!

About Us

Greytrix is a one stop solution provider for Sage ERP and Sage CRM needs. We provide complete end-to-end assistance for your technical consultations, product customizations, data migration, system integrations, third party add-on development and implementation expertise.

Greytrix has some unique solutions of Sage X3 integration with Sage CRMSalesforce.com and Magento eCommercealong with Sage X3 migration from Sage 50 US, Sage Pro and QuickBooks.  We also offer best-in-class Sage X3 customization and development services to Sage business partners, end users and Sage PSG worldwide.

For more information on Sage X3 Integration and Services, please contact us at x3@greytrix.com. We will be glad to assist you.

How to set the default Category as “ACTUAL” in Journal

$
0
0

We have come across the scenario where the Journal which are created from the Sales or Purchase Invoice should not be editable.

We have parameter values which will set the Category as Default when we Post the transaction.

Parameter Values Sales or Purchase Invoice

Img: Parameter Values → Common data(TC) –> Group CPT

This will set default value as actual, which will not allow the user to edit.

Hope this Helps.

About Us

Greytrix is a one stop solution provider for Sage ERP and Sage CRM needs. We provide complete end-to-end assistance for your technical consultations, product customizations, data migration, system integrations, third party add-on development and implementation expertise.

Greytrix has some unique solutions of Sage X3 integration with Sage CRMSalesforce.com and Magento eCommercealong with Sage X3 migration from Sage 50 US, Sage Pro and QuickBooks.  We also offer best-in-class Sage X3 customization and development services to Sage business partners, end users and Sage PSG worldwide.

For more information on Sage X3 Integration and Services, please contact us at x3@greytrix.com. We will be glad to assist you.

How to change the standard Module name?

$
0
0

Have you came across a scenario where you want to change the name of  “Module and Sub Module”.

Module and Sub Module

Image 1: Home Page

Navigate To: Administrator>Authering>Navigation Page

standard Module name

Image 2: Pages

Now Edit the Home Page content.

change the standard module name

Image 3

Edit module name like “Orders to sales orders”.

Orders to sales orders

Image 4: Navigation Pages

Now, you can check the names of Module and sub module.

Navigation Pages

Image 5: Navigation Pages

Hope this helps.

About Us

Greytrix is a one stop solution provider for Sage ERP and Sage CRM needs. We provide complete end-to-end assistance for your technical consultations, product customizations, data migration, system integrations, third party add-on development and implementation expertise.

Greytrix has some unique solutions of Sage X3 integration with Sage CRMSalesforce.com and Magento eCommercealong with Sage X3 migration from Sage 50 US, Sage Pro and QuickBooks.  We also offer best-in-class Sage X3 customization and development services to Sage business partners, end users and Sage PSG worldwide.

For more information on Sage X3 Integration and Services, please contact us at x3@greytrix.com. We will be glad to assist you.

How to find Database size of your folder

$
0
0

You may come across the situation where you would like to know the database size of the folder or amount of space utilized by the folder in the database. Sage X3 has a special feature of getting database size of particular folder in the screen.

New StuffHow to define filter criterion on database query in Sage X3

Just navigate to Developments>Utilities>Verifications>Database> Table reports

As shown in the below Image.

Table report screen

          IMG 1.1  Table report screen

And then click “Ok” button.

On Click of ok button At the bottom of the screen you will get the calculated databse size of your folder. As shown in below image.

Table report screen

          IMG 1.2  Table report screen

Hope this Helps!

About Us

Greytrix is a one stop solution provider for Sage ERP and Sage CRM needs. We provide complete end-to-end assistance for your technical consultations, product customizations, data migration, system integrations, third party add-on development and implementation expertise.

Greytrix has some unique solutions of Sage X3 integration with Sage CRMSalesforce.com and Magento eCommercealong with Sage X3 migration from Sage 50 US, Sage Pro and QuickBooks.  We also offer best-in-class Sage X3 customization and development services to Sage business partners, end users and Sage PSG worldwide.

For more information on Sage X3 Integration and Services, please contact us at x3@greytrix.com. We will be glad to assist you.


How to attach Totals to Heading (Sage X3 People)

$
0
0

In our recent blog “”  we have discussed about Headings, Variables and Totals. Now we are going to see How to Attach Totals to Heading.

TOTALS:-

Totals are used to ensure that each heading has the correct effect on a payslip. Whether it is to increase or deduct or have no effect other than record keeping. Linking correct totals to a heading will be subject to your own scrutiny.

“Generally Totals are use to Store, Deduct or Sum the Amounts calculated as per the Heading.”

Navigate to: Setup → Payroll Plan → Headings → Amounts → Totals.

Totals to Heading in Sage X3

Fig. Attached Total To Heading

sage x3 totals to headings

Fig. RTZ(+,-)

+ Employee’s share:- To Add the Amounts in the Total calculated as per the Heading.

Employee’s share:- To Deduct the Amounts in the Total calculated as per the Heading.

About Us

Greytrix is a one stop solution provider for Sage ERP and Sage CRM needs. We provide complete end-to-end assistance for your technical consultations, product customizations, data migration, system integrations, third party add-on development and implementation expertise.

Greytrix has some unique solutions of Sage X3 integration with Sage CRMSalesforce.com and Magento eCommercealong with Sage X3 migration from Sage 50 US, Sage Pro and QuickBooks.  We also offer best-in-class Sage X3 customization and development services to Sage business partners, end users and Sage PSG worldwide.

For more information on Sage X3 Integration and Services, please contact us at x3@greytrix.com. We will be glad to assist you.

How to enable LOT field in the purchase receipt screen

$
0
0

In Sage X3, we may come across a scenario where we want to enter data manually in the Lot field. To solve this functionality: 

Step 1:  Navigate to: Common Data → Products → Products Category → Receipts

Now, in the Management Rules set the Lot entry as ‘Free’ in the Supplier Receipt type. Refer Below screen shot:

Product Category Screen

Step2:  Navigate to: Purchasing → Receipts → Receipts

By doing above process, it should allow us to enter the data manually in the LOT field. Check below Screen shot.

Purchase Receipt Screen

Hope this blog helps!

About Us

Greytrix is a one stop solution provider for Sage ERP and Sage CRM needs. We provide complete end-to-end assistance for your technical consultations, product customizations, data migration, system integrations, third party add-on development and implementation expertise.

Greytrix has some unique solutions of Sage X3 integration with Sage CRMSalesforce.com and Magento eCommerce along with Sage X3 migration from Sage 50 US, Sage Pro and QuickBooks.  We also offer best-in-class Sage X3 customization and development services to Sage business partners, end users and Sage PSG worldwide.

For more information on Sage X3 Integration and Services, please contact us at x3@greytrix.com. We will be glad to assist you.

How to configure portal expense claims

$
0
0

1. Setup variable to be updated.

configure portal expense claims

Note: Uncheck Expense notes

2. Setup Variable for a portal default value as well as the maximum allowable value to be claimed via the portal.

These can be configured as separate variables or can comprise the same variable.

Setup Variable for a portal default value

Note: Check the Folder, The variable for the default and/or maximum values will usually be a company or folder level inputs

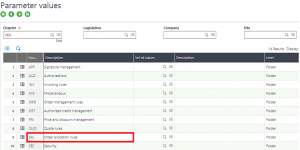
3. Input the default and maximum values.

Access either folder values or company values and input the default and the max values

Input the default and maximum values

4. Create an Expense code.

This will be the option available to the employee to select from via the portal.

Create an Expense code

Validity– If you intend to only allow this claim during a certain date.

Default Value– Default Portal Value must be linked to the variable created. If this is left blank there will be no default

Cap– Maximum Value must be linked to the variable created for this purpose. If this is left blank there will be no maximum applied (very dangerous to ignore!)

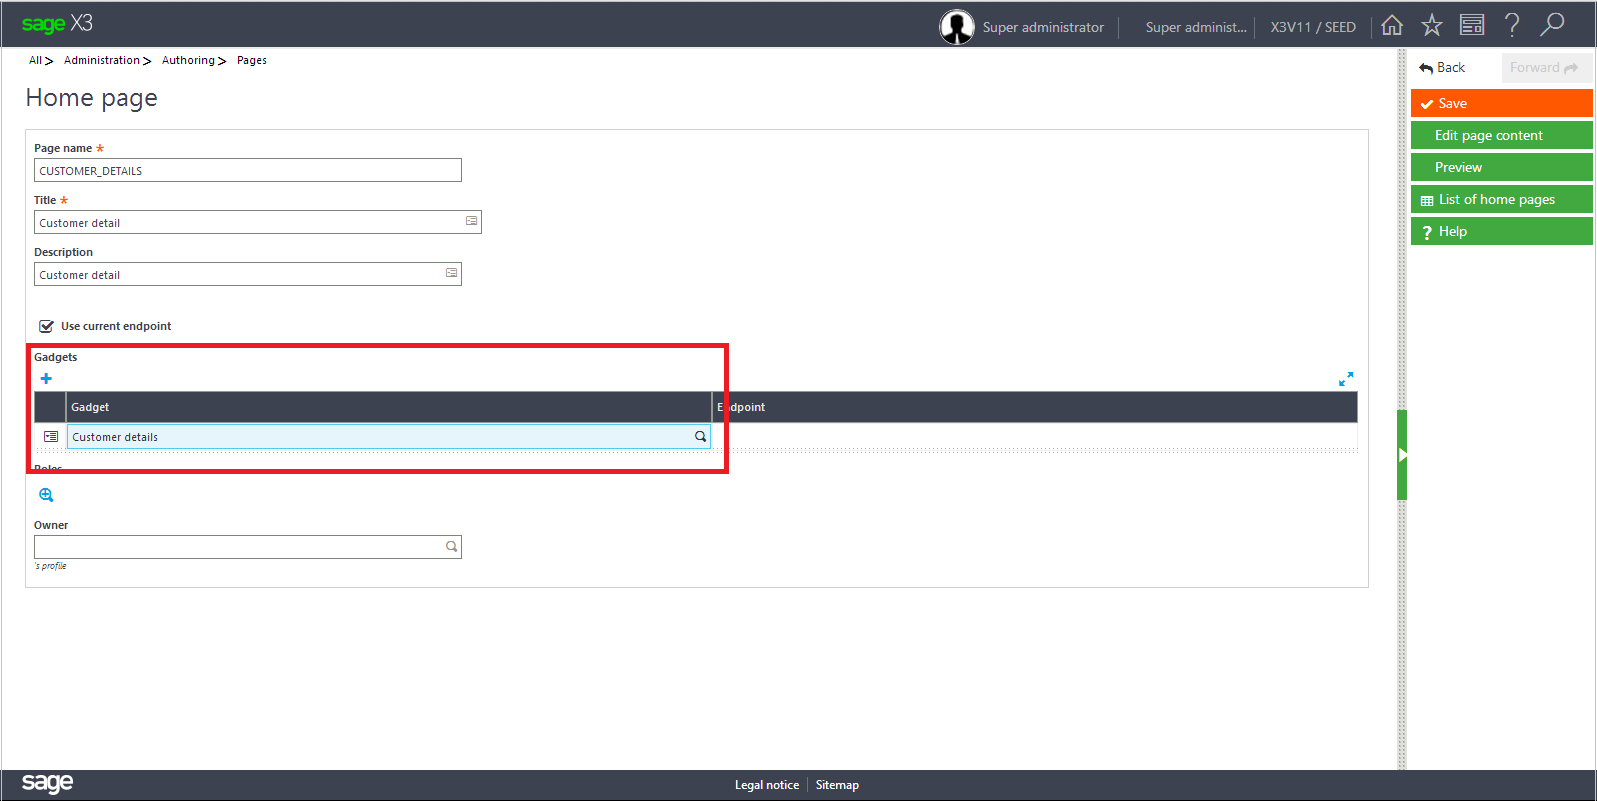
5. Add a Pay Preparation Variable.

This is required so as to advise X3 which already configured pay plan variables are available for use as portal expense claim variables.

Note: Select LISEXS and click Variables tab. Add the variables to be updated hear.

6. Configure expense note transfer

This is required to link the applicable variables to the expense codes and also to advise which column in the portal updates the variable (eg. Quantity or Amount)

Note: In services select the code and In Variable code select the applicable variable. Only variables defined as pay preparation variables in the previous step will be available for selection here.

Note: The data in Amount element column is displaying here. This tells X3 which value in the portal must update the variable in Sage X3.

configure portal expense claims

About Us

Greytrix Africa– Sage Premier Gold Development Partner is a one-stop solution provider for all your Sage ERP and Sage CRM needs. Greytrix Africa is a consulting company that offers solutions across verticals which include accounting and business management, financial reporting, ERP, CRM, HRMS and EDI.

As one of the leading Sage certified X3 Partner, we have a strong sales and implementation industry presence. We offer scalable software development resource for customizations and enhancements within Sage X3. In addition to the Sage X3 development services which we provide to our end customers; our Channel Partners considered us as “Go-To” resource for custom Sage X3 solutions. Thereby, enabling Greytrix to rapidly introduce new products and solutions to the market.

For more information on Sage X3 Consulting Services, please contact us at sales@greytrix.com .We will be glad to assist you.

How to Merge Business Partners (BP) in Sage X3

$
0
0

Many a times, the user creates 2 similar business partners in Sage X3 instead of 1 business partner, this results in 2 separate entities in all the related inquiries or reports. In such cases, Sage X3 provides BP Merge functionality which allows two BP accounts to be merged together, which will automatically transfer all the transactions/balances from one BP to another.

The BP Merge function can be used to transfer postings related to a Business Partner (Source) to another Business Partner (Destination).

Below are two examples of a customer inquiry for two different Business partners, prior to using the BP Merge function.

Navigation: Common Data → Customer → BP situation (right list)

Business Partner 1:

business partner

Business Partner 2:

business partner

Now we will merge the balances of both customers to a single account:

Steps:

  • Navigate to Financials → Utilities → Miscellaneous → BP Merge

merge business partners

  • Select the company and site criteria.
  • Transactions related to the above specified criteria will be merged.

Source BP- Is the BP for which you want to transfer the transactions FROM

Destination BP- Is the BP for which you want to transfer the transactions TO.

  • Click ‘Ok’.
  • System generates Log for after successful operation. If there is any issue during the process it is traced in the log.

log reading

About Us:

Greytrix Africa– Sage Premier Gold Development Partner is a one-stop solution provider for all your Sage ERP and Sage CRM needs. Greytrix Africa is a consulting company that offers solutions across verticals which include accounting and business management, financial reporting, ERP, CRM, HRMS and EDI.

As one of the leading Sage certified X3 Partner, we have a strong sales and implementation industry presence. We offer scalable software development resource for customizations and enhancements within Sage X3. In addition to the Sage X3 development services which we provide to our end customers; our Channel Partners considered us as “Go-To” resource for custom Sage X3 solutions. Thereby, enabling Greytrix to rapidly introduce new products and solutions to the market.

For more information on Sage X3 Consulting Services, please contact us at sales@greytrix.com .We will be glad to assist you.

Learn. Innovate. Network. With Greytrix at Sage Enterprise Management Partner Summit 2018

$
0
0

The Sage Group plc has been the driving force in delivering a unique platform for Partners, Resellers, and Business Builders to learn, network and innovate about Sage solutions every year. From summits to individual sessions, Sage has reached out the global audience showcasing out of the box solutions, optimizing your business with personalized tools, helping customers, colleagues, and partners to reimagine business. This year, Sage has introduced a Sage Enterprise Management (formerly Sage X3) specific event for business builders and partners that is scheduled from May 2nd – 4th, 2018 in Seville, Spain. Greytrix – Sage Gold Development Partner for two decades and a regular sponsor for Sage events is all set to be a part of Sage Enterprise Management Partner Summit as a Gold Sponsor.

sage enterprise management partner summit 2018

Why Attend Sage Enterprise Management Partner Summit – Spain 2018?

Sage Enterprise Management Partner Summit is the largest gathering of elite Sage X3 Partners to showcase your solutions and connect with the Sage Enterprise Management community. Businesses can discover new opportunities with the latest products using Sage Enterprise Management and the Sage ecosystem. This event is the place to meet Sage executives and experts from across the partner ecosystem who can share knowledge on how to amplify the power of Sage Enterprise Management with innovative partner solutions. You can hear firsthand information how customers are using Sage Enterprise Management solution to drive success in their business. World-renowned keynote speakers Lisa McLeod and Philip Carter sharing their experience and knowledge-driven breakout sessions will redefine your business approach towards Sage Enterprise Management.

What is Greytrix bringing to Sage Enterprise Management Partner Summit as a Gold Sponsor this year?

Greytrix has been a leading Sage Gold Development Partner for over two decades, providing a broad range of Sage Enterprise Management (Sage X3) services and solutions across Sage Partner ecosystem. Being recognized for its 5-star rated GUMU™ app on Salesforce AppExchange for Sage ERP – Salesforce and Sage ISV Rockstar Partner for Sage X3 – Sage CRM systems, Greytrix combines the unmatched experience and specialized skills of working across industries and verticals driving innovation to improve the way businesses operate. Greytrix GUMU™ integrated Sage ERP – CRM (Salesforce | Sage CRM) systems allow businesses to streamline and improve productivity, generating sustainable impact with 360° view of operations.

Greytrix Sage Enterprise Management Products & Services

Greytrix Sage Enterprise Management Professional Services

  • Implementation & Configuration
  • Bespoke Customizations
  • Technical Support
  • Migration
  • Integration
  • Onsite Resource Augmentation
  • Offshore Development Center

Greytrix Sage Enterprise Management Development Skillset

  • 4GL Programming
  • Java Bridge Integration
  • Version Upgrades
  • SOAP Webservices
  • Crystal and BI Reporting
  • ADC Programming
  • Designing Dashboards
  • SEI Installation & Upgrades
  • Designing Workflows

Kumar Siddhartha, CEO – Greytrix, along with techno-functional experts will be presenting a session: Clutter to Clarity – Drive your business forward with Customer Relationship Management (CRM). Apart from exhibiting, we also look forward to meeting our Sage Partners and Sage Team at the event and to provide you with insights on how business roadblocks can be eliminated by optimal use of our Greytrix products and services and why GUMU™ utility is the best fit for your specific business environments. Meet us at Greytrix booth and experience the power of our services and solutions!

To schedule your meeting with our Executive and Techno-functional team at Sage Enterprise Management Partner Summit, write to us at na.sales@greytrix.com

How to change/add Dimensions on Journal Entry

$
0
0

We may come across scenarios where we want to add/change dimensions on Journal Entry(Line level). By following below steps we can achieve this functionality.

  • Navigate to Set-up →  Organizational Structure →  Ledgers
  • Select a ledger for which you want to add dimension.

ledger screen

Ledger Screen

  • In CoA and dimension types section increase the No. Of dim. Types for now we have increased from 5 to 7.
  • After increasing dimensions ,dimension types fields are enabled now.
  • Select a dimensions in enabled fields.

Dimensions added for Ledger

Dimensions added for Ledger

Now you can see the dimensions on Journal Entry screen.

Journal Entry

Hope this helps.

About Us

Greytrix is a one stop solution provider for Sage ERP and Sage CRM needs. We provide complete end-to-end assistance for your technical consultations, product customizations, data migration, system integrations, third party add-on development and implementation expertise.

Greytrix has some unique solutions of Sage X3 integration with Sage CRMSalesforce.com and Magento eCommerce along with Sage X3 migration from Sage 50 US, Sage Pro and QuickBooks.  We also offer best-in-class Sage X3 customization and development services to Sage business partners, end users and Sage PSG worldwide.

For more information on Sage X3 Integration and Services, please contact us at x3@greytrix.com. We will be glad to assist you.

How to solve “WO status cannot be tracked” error message in Production tracking screen

$
0
0

In Sage X3, we may come across a scenario where we find difficulty in searching of work order number in Sage X3. To solve this functionality: 

Navigate to: Manufacturing → Planning → Work Order

path to work order screen

Path to Work Order Screen 

Now check the work order number ‘WOZA0120195’ in the  Production Tracking Screen.

sage x3 work order screen

Work Order Screen

Now refer below screen shot, as we can see that we are unable to find this work order no. ‘WOZA0120195’ in the search box.

Navigate to: Manufacturing → Production Tracking → production tracking

production tracking screen

Now to solve this, go back to the work order screen, open the required work order number and then change the Order Status field to ‘Firm‘ and also check in the production tracking screen, there will  get that work order number by this process. Check below Screenshot:

Work Order Screen

Work Order Screen

Production Tracking screen

Production Tracking screen

Hope this blog helps!

About Us

Greytrix is a one stop solution provider for Sage ERP and Sage CRM needs. We provide complete end-to-end assistance for your technical consultations, product customizations, data migration, system integrations, third party add-on development and implementation expertise.

Greytrix has some unique solutions of Sage X3 integration with Sage CRMSalesforce.com and Magento eCommerce along with Sage X3 migration from Sage 50 US, Sage Pro and QuickBooks.  We also offer best-in-class Sage X3 customization and development services to Sage business partners, end users and Sage PSG worldwide.

For more information on Sage X3 Integration and Services, please contact us at x3@greytrix.com. We will be glad to assist you.


How to add the filters in the object based selection

$
0
0

We have scenario where we need to show same selection as per standard object but we need to have additional filter on selection.

In this scenario, there is no need to add the additional selection criteria. We just need to add the following selection filter as below.

Example:

We need Customer selection using the BPC object, but in that selection we need to have filter for country as “Angola”.

Step 1:

For this we need add the selection filter in object as Shown below.

object screen selection

Img: Object Screen- Selection

Step 2:

In the screen we need have type as BPC as shown below:

screen field

Img: Screen field

Step 3:

We then need to click on option which is present in the right click. Where we will have a Selection option available which we have added in the Object Screen.

options in type

About Us

Greytrix is a one stop solution provider for Sage ERP and Sage CRM needs. We provide complete end-to-end assistance for your technical consultations, product customizations, data migration, system integrations, third party add-on development and implementation expertise.

Greytrix has some unique solutions of Sage X3 integration with Sage CRMSalesforce.com and Magento eCommerce along with Sage X3 migration from Sage 50 US, Sage Pro and QuickBooks.  We also offer best-in-class Sage X3 customization and development services to Sage business partners, end users and Sage PSG worldwide.

For more information on Sage X3 Integration and Services, please contact us at x3@greytrix.com. We will be glad to assist you.

How to change background of the log in page

$
0
0

We get the default image as a background of a log in page as shown in below screenshot

change background of log
 1.1 log in page

To change it you can go to the path

D:\Sage\Syracuse\syracuse\bin\node_modules\syracuse-auth\html\images

In the images folder put the image which you want to be seen as a background of a page with name background

changing an image
1.2 after changing an image 

About Us

Greytrix is one stop solution provider for Sage ERP and Sage CRM needs. We provide complete end-to-end assistance for your technical consultations, product customizations, data migration, system integrations  third party add-on development and implementation expertise.

Greytrix have some unique solutions of Sage X3’s integration with Sage CRM, Salesforce.com and Magento eCommerce. It also offers best-in-class Sage X3 customization and development services to Sage business partners, end users, and Sage PSG worldwide.

For more information on Sage X3 Integration and Services, please contact us at x3@greytrix.com . We will be glad to assist you.

How to Rename Menus in Favourites in Sage X3

$
0
0

New versions of Sage X3 provides many additional useful functions and features, unlike V6. New versions of Sage X3 provides a special feature for renaming your favorite menus. Sometimes it becomes difficult to remember X3 menu with it’s defined name. To overcome this, we can rename menus with easy names for quicker access.

There is a star(*) symbol in front of each menu. If you click on a star, the corresponding menu gets displayed on the (Favorites) menu bar on the top of the screen with the same title. However, we can change the title of menus in favorites.

Follow the below steps to achieve the same.

Steps:

1. Click on arrow shown in below screenshot.

Rename Menu in sage x3

Fig. Menu

  1. Popup will get displayed as shown below.
Bookmark

Fig. Bookmark

  1. After clicking on pencil symbol, you can edit the title of a menu.
  2. Here, ‘Script editor’ get renamed to ‘Code File’. Refer below screenshot.
Rename Menus in Favourites in Sage X3

Fig. Output

Hope this helps!

About Us

Greytrix is a one-stop solution provider for Sage ERP and Sage CRM needs. We provide complete end-to-end assistance for your technical consultations, product customizations, data migration, system integrations, third-party add-on development and implementation expertise.

Greytrix has some unique solutions of Sage X3 integration with Sage CRMSalesforce.com, and Magento eCommerce along with Sage X3 migration from Sage 50 US, Sage Pro and QuickBooks.  We also offer best-in-class Sage X3 customization and development services to Sage business partners, end users, and Sage PSG worldwide.

For more information on Sage X3 Integration and Services, please contact us at x3@greytrix.com. We will be glad to assist you.

How to close a site in Sage Enterprise Management (Sage X3) that is no longer in use

$
0
0

In your Sage Enterprise Management (formerly Sage X3), there can be sites that you may want to close down. The prominent reason for the closure of sites in Sage Enterprise Management (Sage X3) can be because of the minimal usage. Closing a site in Sage Enterprise Management (Sage X3) is a difficult process.

To address the closure of site that is no longer in use, in Sage Enterprise Management (Sage X3), Greytrix provides a step by step procedure:

  1. To close the site, navigate to Setup → General Parameter → Parameter values
  2. Select Chapter TC, Group CLO and set the values for the parameter as shown below screenshot.
Parameter value

1.1 Parameter value screenshot

  1. Set the date of the parameter as stated below:

ACHENDDAT: – To set Purchase end date

CPTENDDAT: – To set Accounting end date

TRSENDDAT: – To set A/P – A/R accounting end date

VENENDDAT: – To set sales end date

This is how you can close a site in Sage Enterprise Management (Sage X3) that is no longer in use.

About Us

Greytrix is a one-stop solution provider for Sage ERP and Sage CRM needs. We provide complete end-to-end assistance for your technical consultations, product customizations, data migration, system integrations, third-party add-on development and implementation expertise.

Greytrix has some unique solutions of Sage X3 integration with Sage CRMSalesforce.com, and Magento eCommerce along with Sage X3 migration from Sage 50 US, Sage Pro and QuickBooks.  We also offer best-in-class Sage X3 customization and development services to Sage business partners, end users, and Sage PSG worldwide.

For more information on Sage X3 Integration and Services, please contact us at x3@greytrix.com. We will be glad to assist you.

How to define default allocation type used in order entry | Sage X3

$
0
0

Sage Enterprise Management (formerly Sage X3) is a robust financial accounting system with a wide range of features and functionalities aligned with your specific business requirements. In this blog, we will discuss one of the important concepts of defining default allocation type in Sage Enterprise Management (formerly Sage X3) used in Order entry. Defining an allocation type is required for effective management of allocation process in Sage X3. However, there are different methods and parameters that govern how the order allocation behaves in the system. Let’s proceed further with defining the default allocation type in Sage X3.

Parameter ALLTYP (Allocation type) is used to define the default allocation type in Sage X3 for order entry. The combination of values for this parameter type include –

  • Global
  • Detailed

Global – The type of allocation is general (i.e., not lot or location specific). This allocation is common in environments where you don’t wish to lock in specific inventory against an order in advance. The global allocation refers to a product-site (reserved stock)

Detailed – The detailed allocation is the reservation of inventory from a specific location and/or lot. The detailed allocation refers to a stock line (allocated stock)

You can define a specific parameter value by following the below procedure:

Navigate to: Setup General → Parameters Value → Parameters Value

Parameter values Screen

Fig.Parameter values Screen

Parameter values detail Screen

Fig.Parameter values detail Screen

About Us

Greytrix is a one-stop solution provider for Sage ERP and Sage CRM needs. We provide complete end-to-end assistance for your technical consultations, product customizations, data migration, system integrations, third-party add-on development and implementation expertise.

Greytrix has some unique solutions of Sage X3 integration with Sage CRMSalesforce.com and Magento eCommerce along with Sage X3 migration from Sage 50 US, Sage Pro and QuickBooks.  We also offer best-in-class Sage X3 customization and development services to Sage business partners, end users and Sage PSG worldwide.

For more information on Sage X3 Integration and Services, please contact us at x3@greytrix.com. We will be glad to assist you.

Viewing all 1515 articles
Browse latest View live


<script src="https://jsc.adskeeper.com/r/s/rssing.com.1596347.js" async> </script>