Sage Business Cloud Enterprise Management HR (formerly Sage X3 People) provides users with the best combination of functionality, technology, and value. One of the functions of Sage X3 People is the Import Function. Users can use the Import function to upload records in Sage X3 People. While uploading records, in the standard Sage X3 People, users might come across a standard upload screen as shown below. Sage X3 People allows users to create their customized upload format to upload records apart from the standard upload screen. This blog guides you with a step by step procedure to create a new upload format in Sage X3 People.
7 Simple Steps to create a new upload format
Step 1: Navigate to Usage → Import/Export → Import
Image may be NSFW.
Clik here to view.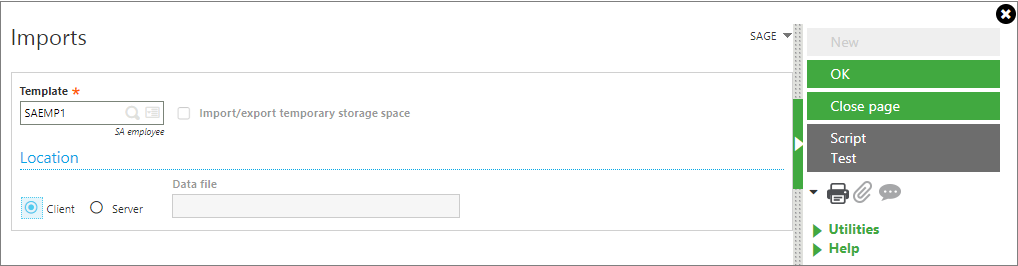
Step 2: Navigate to Setup → Import/export → Import/Export templates
Image may be NSFW.
Clik here to view.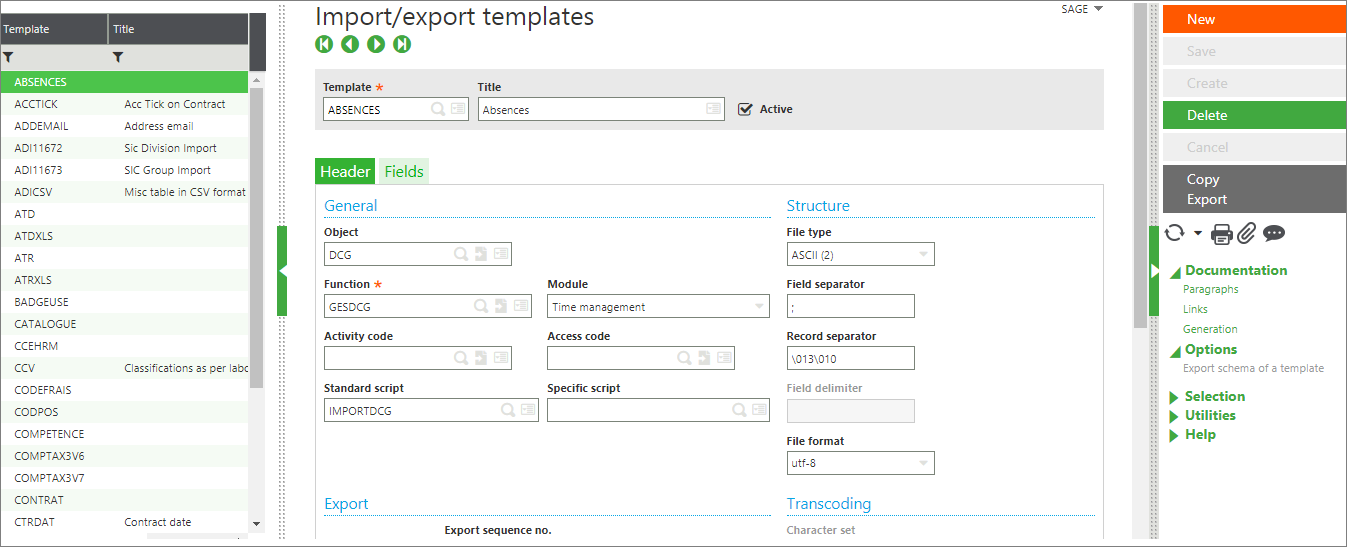
Step 3: Click on New and create a new upload template. Below is a sample of a new upload created.
Image may be NSFW.
Clik here to view.
Step 4: Scroll to the Identifiers section and select the required table.
Image may be NSFW.
Clik here to view.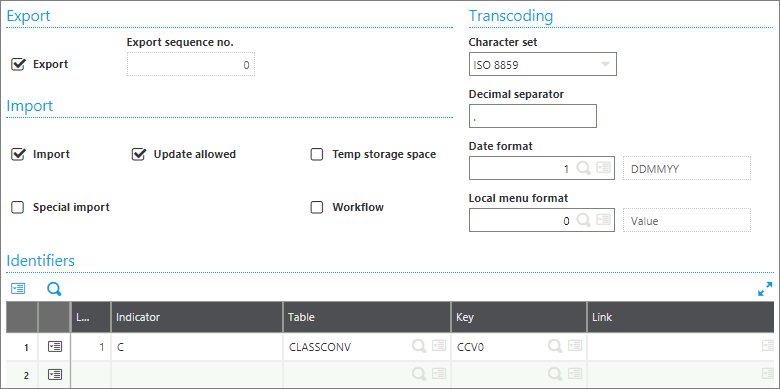
Step 5: Click on the Fields tab and select the columns required for uploading the data.
Image may be NSFW.
Clik here to view.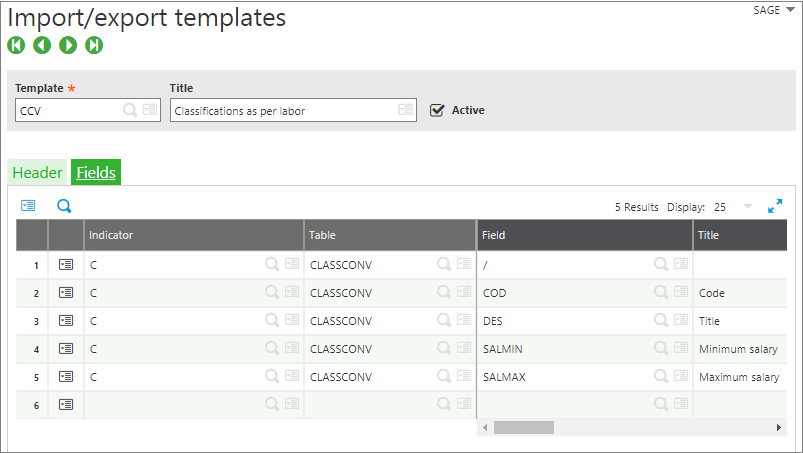
Step 6: Click on the Action button and select Excel export as shown below.
Image may be NSFW.
Clik here to view.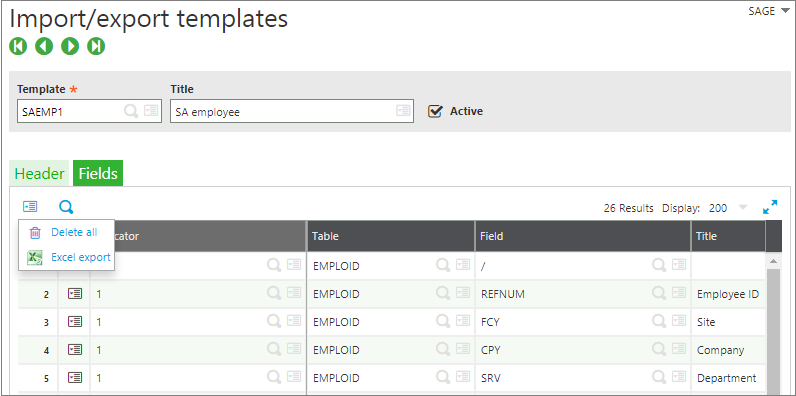
Step 7: Transpose the above fields in the Excel. Post transposing, you will have an image as below.
Image may be NSFW.
Clik here to view.
Step 8: Fill the data in the columns. Below image shows the data in the Excel.
Image may be NSFW.
Clik here to view.
Concatenate the data in the fields and paste the concatenated data in a notepad file. While concatenating ensure that the separator (comma “,”) is used to separate the fields. The upload file should be similar as shown below.
Image may be NSFW.
Clik here to view.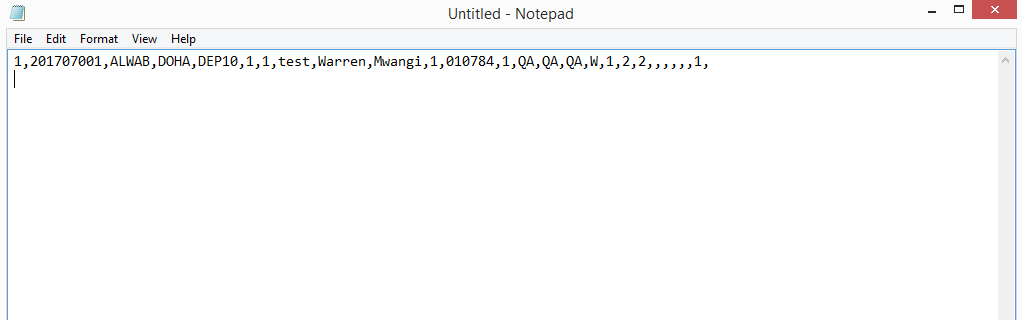
Step 9: To upload the text file, below are the steps to be followed.
Navigate to Setup → Imports/export → Imports
Image may be NSFW.
Clik here to view.
Select the upload name and click OK. Users will see the screen as shown below after clicking OK.
Image may be NSFW.
Clik here to view.
Select the notepad file which contains the concatenated data and upload the same.
This is how users can use a customized upload format for uploading records in Sage Business Cloud Enterprise Management HR (formerly Sage X3 People).
About Us
Greytrix Africa– Sage Premier Gold Development Partner is a one-stop solution provider for all your Sage ERP and Sage CRM needs. Greytrix Africa is a consulting company that offers solutions across verticals which include accounting and business management, financial reporting, ERP, CRM, HRMS, and EDI.
As one of the leading Sage certified X3 Partner, we have a strong sales and implementation industry presence. We offer scalable software development resource for customizations and enhancements within Sage X3. In addition to the Sage X3 development services which we provide to our end customers; our Channel Partners considered us as “Go-To” resource for custom Sage X3 solutions. Thereby, enabling Greytrix to rapidly introduce new products and solutions to the market.
For more information on Sage X3 Consulting Services, please contact us at sales@greytrix.com.We will be glad to assist you.